
Comandos en Android Terminal Emulator/Termux (Debian/Ubuntu)
- Requisitos y primeros pasos
- Comandos básicos de navegación y sistema
- Gestión de archivos y permisos
- Compresión y archivos
- Información del sistema y monitorización
- Red y conectividad (LAN / Wi-Fi)
- Paquetes y gestión de software
- Copias de seguridad rápidas
- Atajos, edición y manipulación de texto
- Ejemplo práctico: crear carpeta, copiar, verificar y comprimir
- Buenas prácticas y seguridad
- Lecturas recomendadas
Convertir tu Android en una “mini consola” Linux es más sencillo de lo que parece. Con apps como Termux o Android Terminal Emulator puedes ejecutar comandos de GNU/Linux (base Debian/Ubuntu), automatizar tareas y administrar archivos del sistema —sin root para la mayoría de acciones. A continuación encontrarás una guía reescrita y organizada with comandos esenciales, ejemplos y buenas prácticas para que empieces seguro.
Note: solo usa comandos con privilegios (your o sudo) si sabes exactamente qué haces. Un error con permisos de superusuario puede dejar tu dispositivo inservible.

Requisitos y primeros pasos
- Instala Termux desde su repositorio oficial o tienda confiable.
- Actualiza paquetes base:
pkg update && pkg upgrade -y
pkg install nano git curl openssh
En algunos entornos (por ejemplo, Android Terminal Emulator) podrás escalar privilegios con your si el dispositivo está rooteado. En Termux se emplea tsu en ROMs compatibles.
Comandos básicos de navegación y sistema
| Comando | ¿Para qué sirve? | Ejemplo |
|---|---|---|
pwd | Ver el directorio actual. | pwd |
ls | Listar archivos (usa -l, -a para más info). | ls -la |
cd | Cambiar de directorio. | cd /sdcard/Downloads |
uname -a | Info del kernel/arquitectura. | uname -a |
exit | Salir de la shell o de root. | exit |
Gestión de archivos y permisos
| Comando | Descripción | Ejemplo |
|---|---|---|
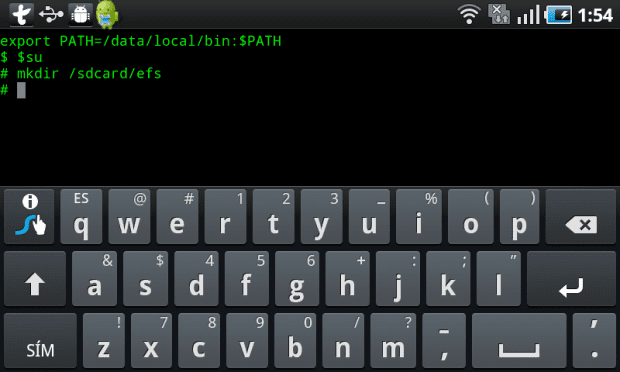
mkdir | Crea directorios. | mkdir -p /sdcard/respaldos/efs |
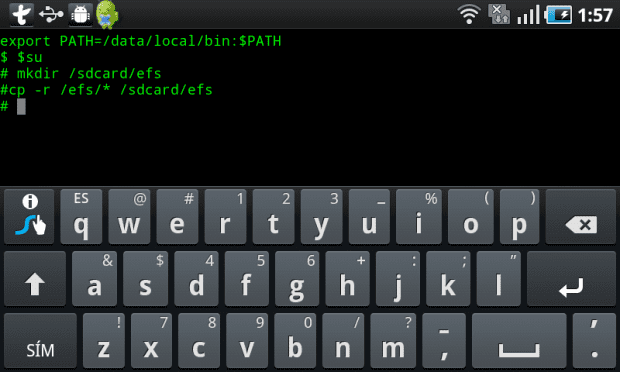
cp | Copia archivos/carpetas (-r recursivo). | cp -r /efs/* /sdcard/respaldos/efs |
mv | Mueve o renombra. | mv file.log file.log.bak |
rm | Elimina (cuidado con -rf). | rm -rf carpeta_tmp |
chmod | Cambia permisos. | chmod 644 archivo.txt |
chown | Cambia propietario/grupo. | chown u0_a123:u0_a123 archivo.txt |
Compresión y archivos
| Acción | Comando |
|---|---|
Comprimir en .tar.gz | tar -czvf backup.tar.gz carpeta/ |
Descomprimir .tar.gz | tar -xzvf backup.tar.gz |
Comprimir en .zip | zip -r archivo.zip carpeta/ |
Descomprimir .zip | unzip archivo.zip |
Información del sistema y monitorización
cat /proc/cpuinfo— CPU y núcleos.cat /proc/meminfo— Memoria.df -h— Espacio en disco.du -sh *— Tamaño de carpetas.topohtop— Procesos y uso de CPU/RAM.ps -A— Listar procesos.kill -9 <PID>— Forzar cierre de un proceso.
Red y conectividad (LAN / Wi-Fi)
| Objetivo | Comando |
|---|---|
| Ver IP y adaptadores | ip a o ifconfig |
| Tabla de rutas | ip route o route -n |
| Probar conectividad | ping -c 4 8.8.8.8 |
| Comprobar puertos abiertos | netstat -tulnp |
| Escanear redes Wi-Fi (según soporte) | iwlist scan |
ls -l en Android.Paquetes y gestión de software
En Termux el gestor por defecto es pkg/apt. Si desplegaste un entorno Debian/Ubuntu en proot o contenedor, usa apt directly.
| Acción | Comando |
|---|---|
| Actualizar índices | apt update |
| Actualizar paquetes | apt upgrade -y |
| Install | apt install <paquete> |
| Eliminar | apt remove <paquete> |
| Search | apt search <texto> |
Copias de seguridad rápidas
Antes de experimentar, crea un respaldo básico de tus configuraciones y archivos importantes.
# Crear carpeta de backups en la SD
mkdir -p /sdcard/backups/termux

# Respaldar la configuración de Termux
tar -czvf /sdcard/backups/termux/termux-home-$(date +%F).tar.gz $HOME
Atajos, edición y manipulación de texto
nano archivo.txt— Editor simple en terminal.grep "cadena" archivo.log— Buscar texto.sed 's/viejo/nuevo/g' archivo.txt— Reemplazo masivo.head,tail -f— Ver inicio/fin de archivos y seguimiento de logs.
Ejemplo práctico: crear carpeta, copiar, verificar y comprimir
# 1) Crear carpeta de trabajo
mkdir -p /sdcard/proyectos/demo

# 2) Copiar archivos de /efs (si existe) a la SD (requiere permisos)
cp -r /efs/* /sdcard/proyectos/demo 2>/dev/null

# 3) Comprobar contenido
ls -lh /sdcard/proyectos/demo

# 4) Comprimir para trasladar o guardar
cd /sdcard/proyectos
tar -czvf demo-$(date +%F).tar.gz demo
Buenas prácticas y seguridad
- Evita ejecutar comandos destructivos (
rm -rf /) o en rutas que no dominas. - No concedas root a apps desconocidas.
- Documenta tus pasos en un log de texto para revertir cambios si hace falta.
- Trabaja en
/sdcardsiempre que sea posible y haz backups frecuentes.
Lecturas recomendadas
- Las mejores distribuciones de Linux
- Cómo instalar Kali Linux en máquina virtual
- Wiki oficial de Termux
Conclusión: con esta lista compacta tendrás a mano los comandos que más se usan en Android + GNU/Linux (Debian/Ubuntu). Empieza por lo básico, practica en carpetas seguras y, cuando tengas confianza, automatiza tus tareas con scripts.
Write us a comment: