Install Kali Linux on Virtual Box latest version
Como instalar kali linux correctamente dentro de una maquina virtual, Kali Linux es una distribución de Linux basada en Debian orientada a diversas tareas de seguridad de la información, como pruebas de penetración, investigación de seguridad, informática forense e ingeniería inversa.
Kali Linux es la plataforma indiscutible de pruebas de penetración de código abierto estándar de la industria.
Hay muchas distribuciones de Linux disponibles, y aunque debemos prestar atención a ciertos aspectos, el proceso de virtualización para cada distribución es muy similar. Por ello, en este artículo nos centraremos en revisar el proceso de creación e instalación de Kali Linux en una máquina virtual, y en otro artículo explicaremos con más detalle cómo configurar la conexión a Internet y otros aspectos de esta distribución segura. La Internet.
YOU CAN ALSO READ: HOW TO INSTALL KALI LINUX ON VMWARE
Create a virtual machine using Kali Linux in VirtualBox
Para comenzar el procedimiento, dos cosas será necesarias, en primero lugar el Hypervisor, en este caso será VirttualBox y una imagen ISO de Kali Linux para proceder a su instalación.
- Utilizaremos la versión de VirtualBox 6.0, la cual podremos descargar desde éste enlace
- También utilizaremos la última versión de Kali Linux disponible que es la 2018.4 en su versión de 64 bits. Descárgala desde su official website
Con todo listo, abriremos VirtualBox y, situados en la pantalla principal, pulsaremos sobre “Máquina -> Nueva” para comenzar la creación de esta VM.
Recomendamos pulsar sobre el botón inferior “Expert mode” para obtener la totalidad de las opciones de configuración de la máquina virtual.
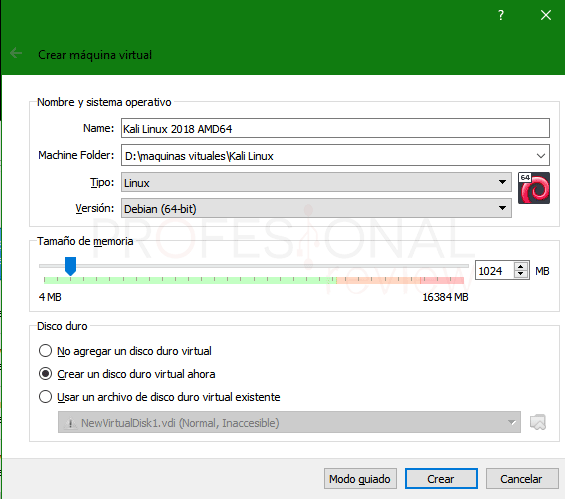
Bueno, vamos a nombrarlo y luego elegir el tipo de sistema Linux y la versión de Debian (64 bits), porque nuestro sistema está basado en Debian.
También pondremos la cantidad de RAM, usaremos el mínimo requerido, que es 1024 MB, pero si tienes más memoria pon al menos 2 GB.
Finalmente, elegimos la opción "Create virtual hard disk now", porque la máquina virtual se creará desde cero. Después de terminar, todo está como deseamos, haga clic en "Crear".
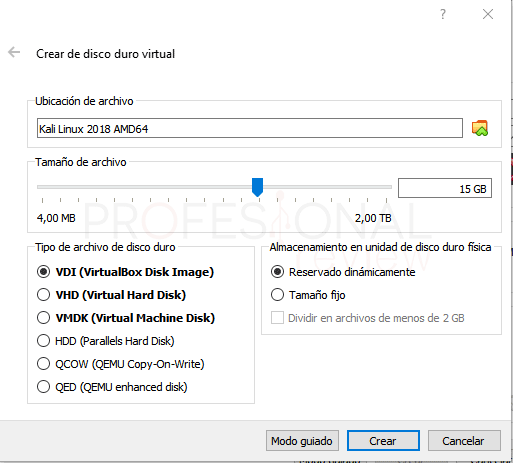
En la siguiente pantalla tendremos que seleccionar el espacio de almacenamiento del disco duro virtual. Como antes, usaremos el requisito mínimo, que es de 15 GB. Nuevamente recomendamos que si desea utilizar activamente el sistema, seleccione más espacio para evitar espacio insuficiente, al menos 25 GB.
Como formato del disco duro virtual, lo mantenemos en VDI por defecto, y seleccionaremos la opción "Reserva dinámica" para que cuando usemos el disco duro, el espacio real en el disco duro se asigne dinámicamente. Cuando termine, haga clic en "Create.
Configuring Kali Linux virtual machine in VirtualBox
Eso sí, antes de instalar el sistema operativo, tendremos que seleccionar la imagen ISO para colocarla en el lector de CD virtual para que se pueda instalar el sistema.
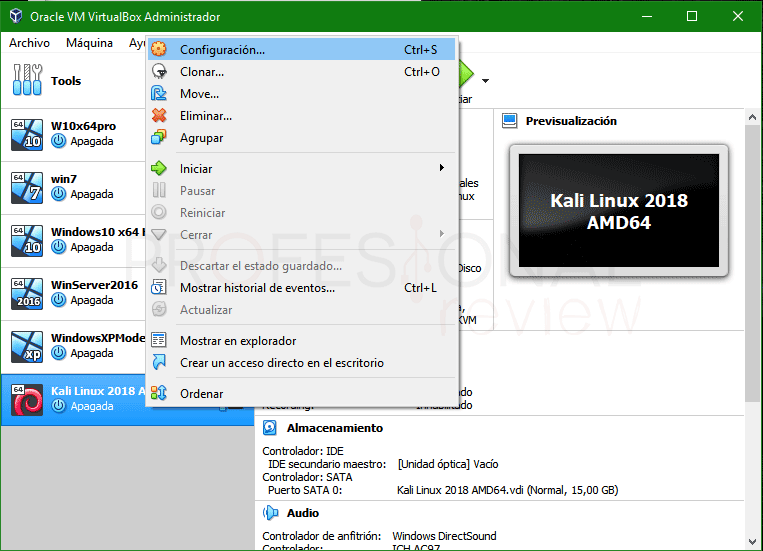
Haga clic en la máquina virtual creada y seleccione la opción "Configuración".
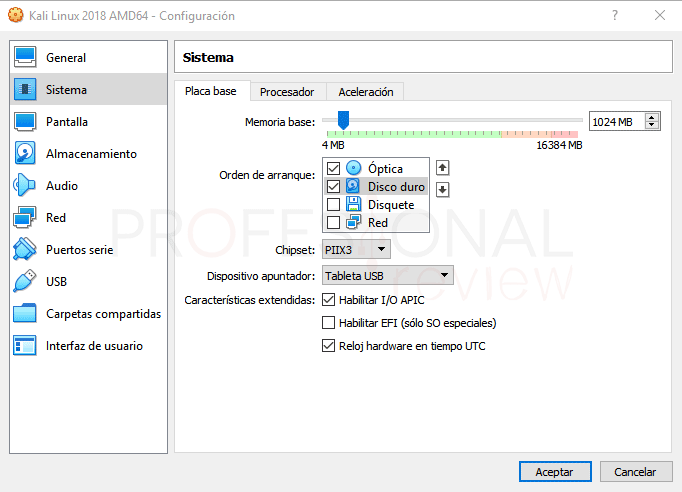
La primera modificación de haremos será remove the floppy disk from the boot list en el apartado “General”, ya que no lo queremos absolutamente para nada. En principio, no tendremos que activar la opción de EFI para la BIOS, porque solamente hará que darnos problemas.
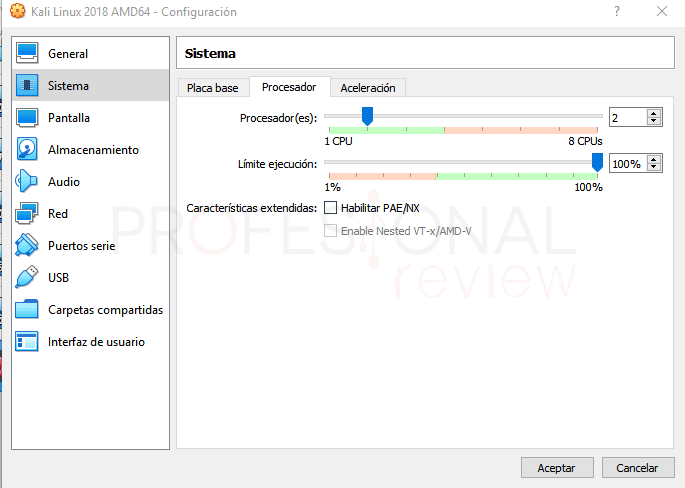
En el apartado de “System”, seleccionaremos el uso de dos núcleos de nuestro procesador, si tenemos más o queremos asignárselos todos, adelante. Mayor velocidad obtendremos si le vamos a dar un uso intenso a la distro.
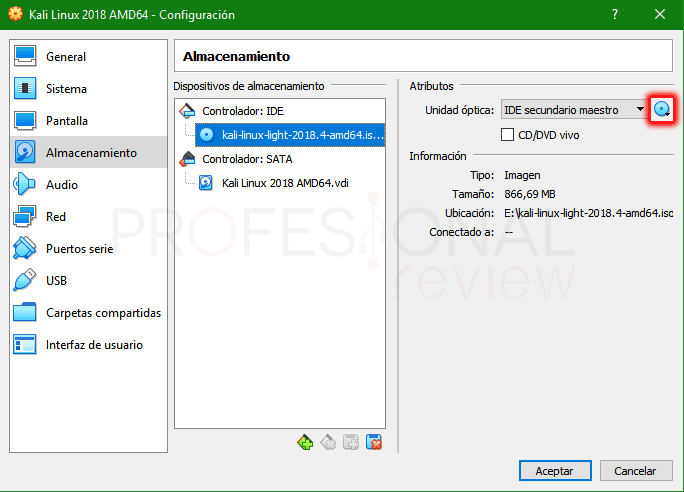
Ahora iremos directo a la sección de “Storage” para seleccionar nuestro lector de CD virtual y click on the disk icon on the right side of the screen. Select the ISO image of Kali Linux wherever we have stored it during the download.
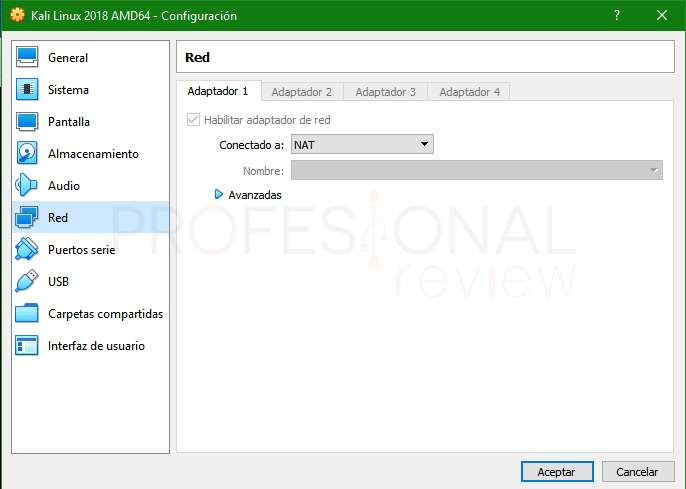
En el apartado de red, por ahora lo dejaremos tal y como está, es decir, in NAT mode para tener acceso a Internet a través de nuestro equipo físico. En un artículo sucesivo, veremos cómo configurar este aspecto más en detalle, por si no da algún problema de primeras.
Pues bien procedemos a iniciar la máquina virtual para instalar el sistema operativo.
Installation process of Kali Linux 2018.4
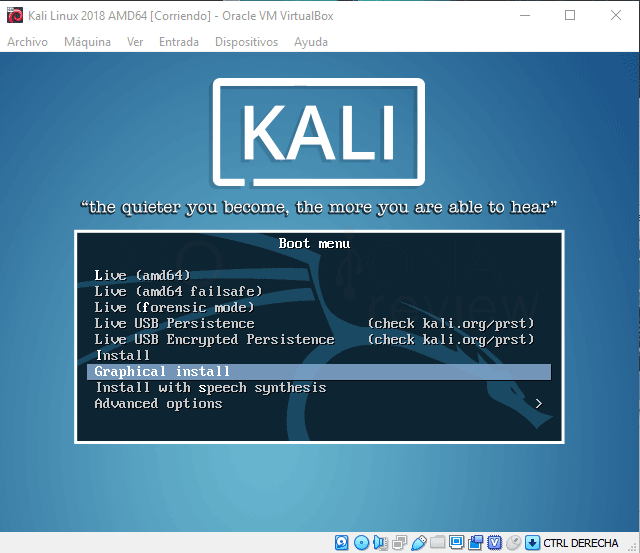
El asistente es bastante similar al de todas las distribuciones basadas en Debian. Comenzamos seleccionando la opción “Graphical install” si es que lo queremos con GUI.
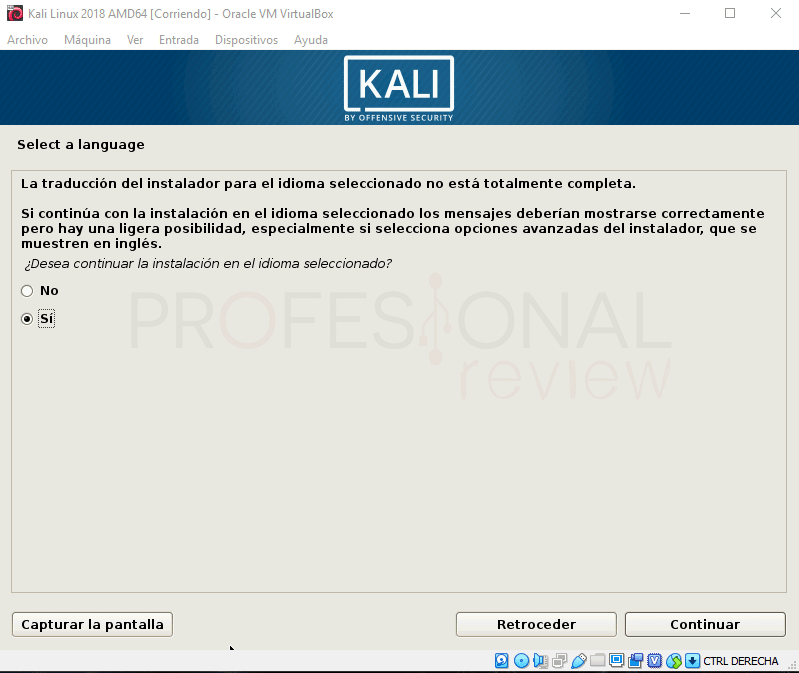
Seleccionamos nuestro lenguaje de instalación y aceptamos el aviso de que la traducción no va a estar completa.
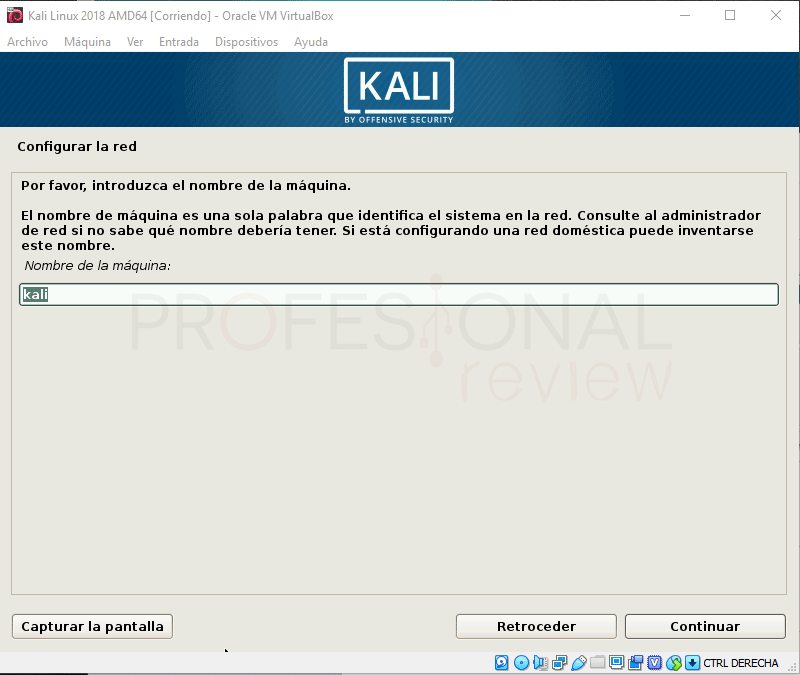
Ahora tenemos que poner el nombre de la computadora, que es muy importante para identificar la computadora en la red, así que ponemos un nombre de computadora para que podamos familiarizarnos con ella si es necesario.
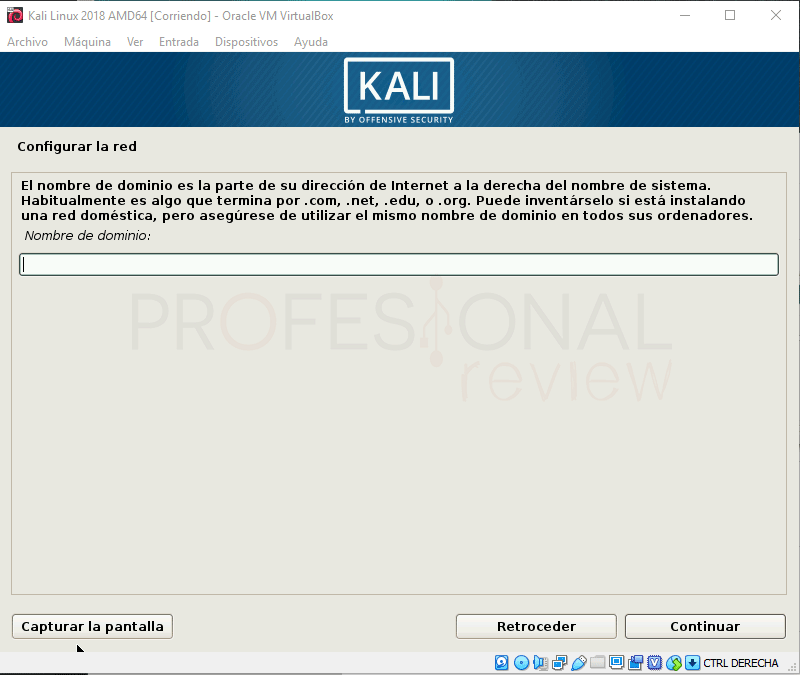
Luego se nos preguntó si la máquina estará ubicada en una red bajo un determinado dominio, por ejemplo, con Active Directory, o simplemente porque tenemos un dominio activo. Dado que estamos en un entorno familiar, no hay nada que podamos hacer.
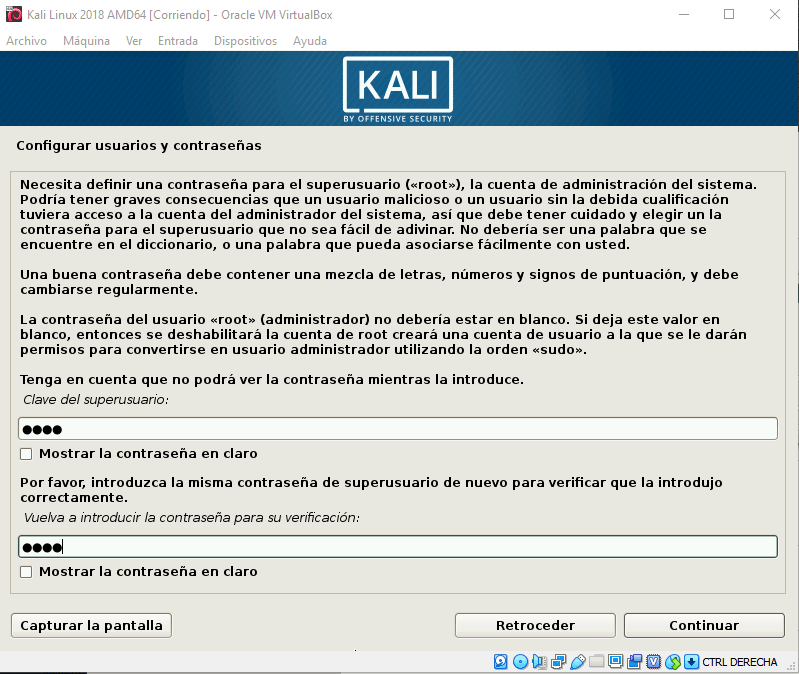
En la nueva ventana ingresaremos la contraseña del usuario root. Este usuario será el usuario activo de esta máquina en el sistema, es decir, siempre seremos el usuario root, por lo que para garantizar tu seguridad, tendremos que ingresar una buena contraseña, como 1234 ... o don no ingrese.
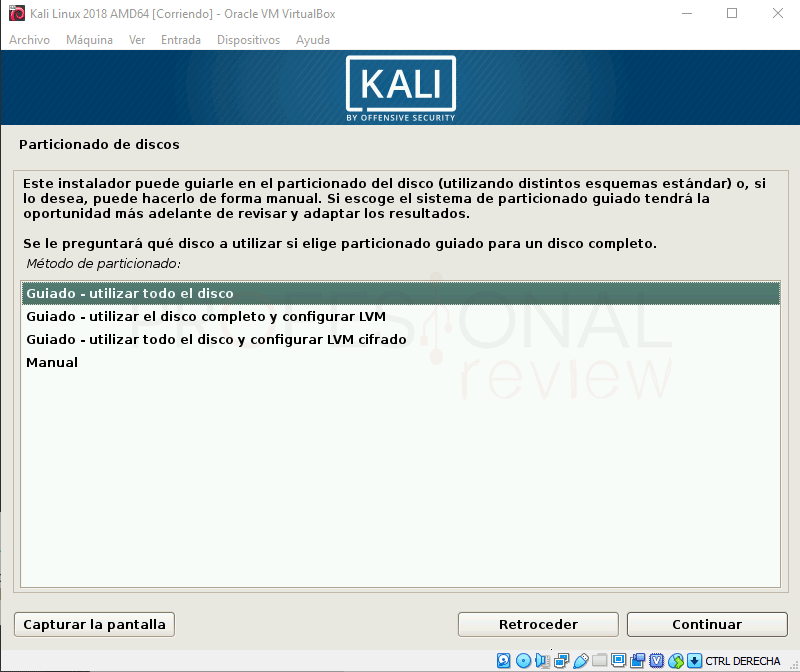
Ahora ingresamos a la configuración del modo de instalación que se ejecutará. No nos complicaremos las cosas, elegiremos el modo "boot", en el que usaremos todo el disco duro. Después de todo, es una máquina virtual.
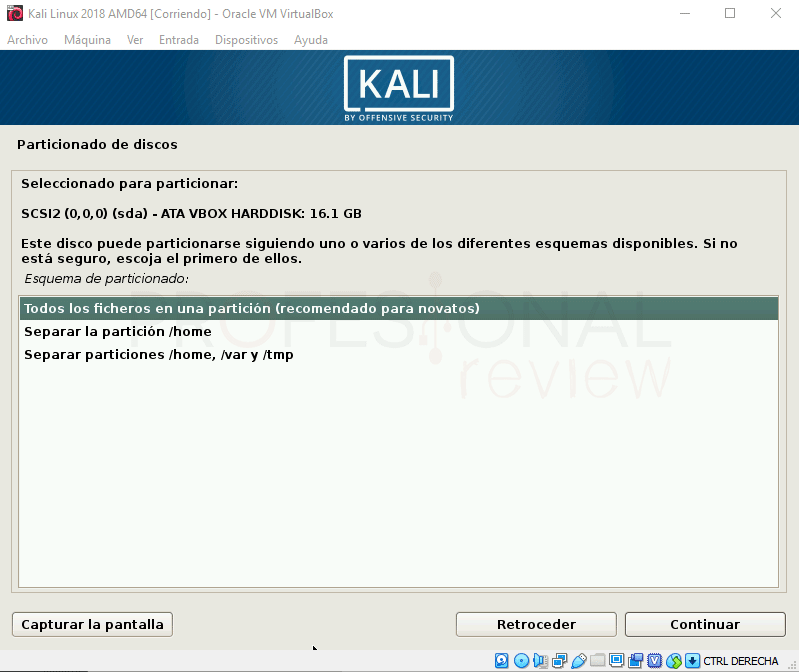
También elegiremos que todos los archivos estén en la misma partición, aunque podemos elegir el sistema para crear tres particiones si queremos instalar / home, / var and / tmp in different partitions.
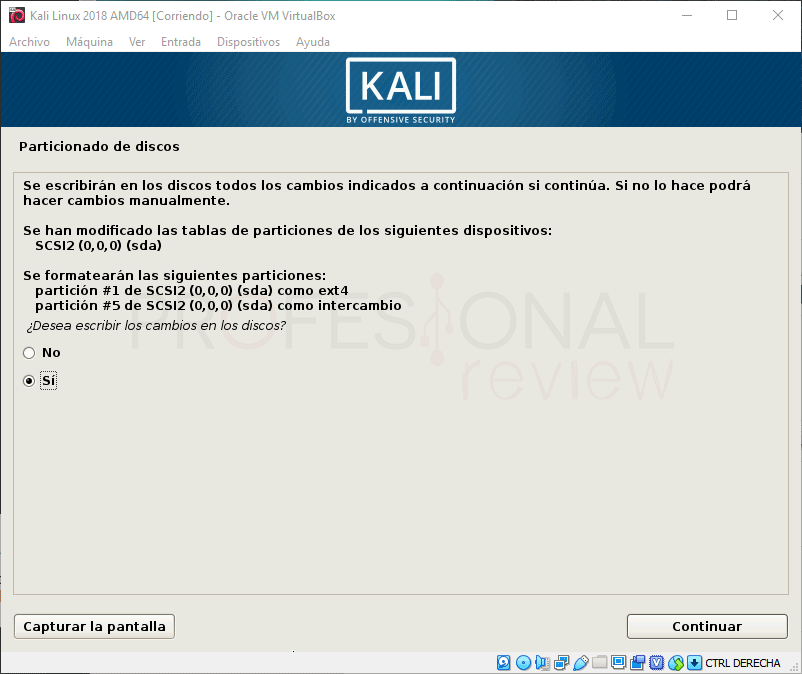
Te mostraremos un resumen de la acción a realizar. En cualquier caso, de forma predeterminada, Linux siempre especifica 1 GB de espacio para memoria virtual o intercambio. Será inamovible.
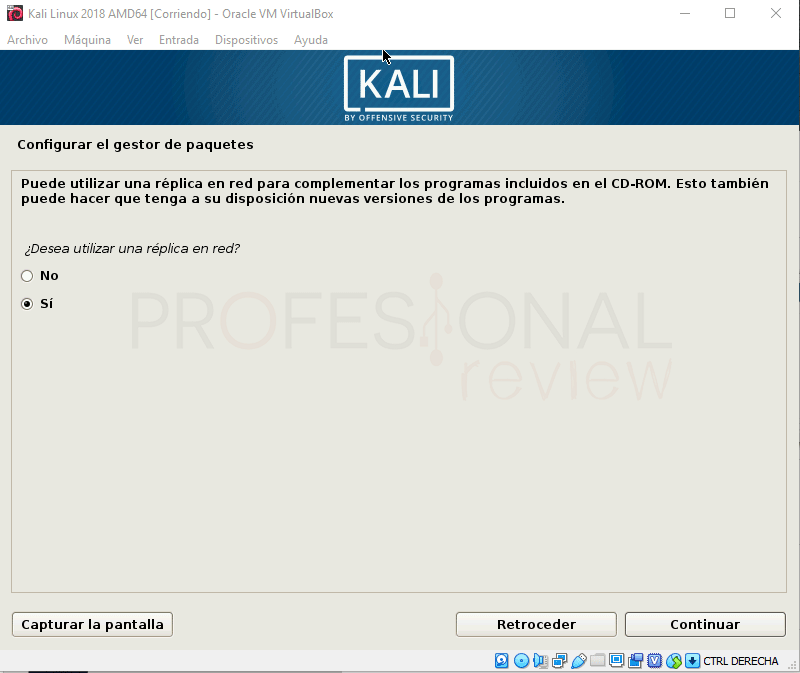
Antes de comenzar con el proceso de instalación de ficheros, se nos preguntará si deseamos hacer una réplica de la red, generally for program updates. Nosotros elegimos que sí queremos hacerla, tampoco vamos a perder nada.
At this point, si no tenemos una red activa, se nos mostrará un error. No debemos preocuparnos, ya que tras asegurarnos de que la tarjeta de red esté activa en la MV, más adelante podremos repetir el proceso para hacer aparecer esta opción.
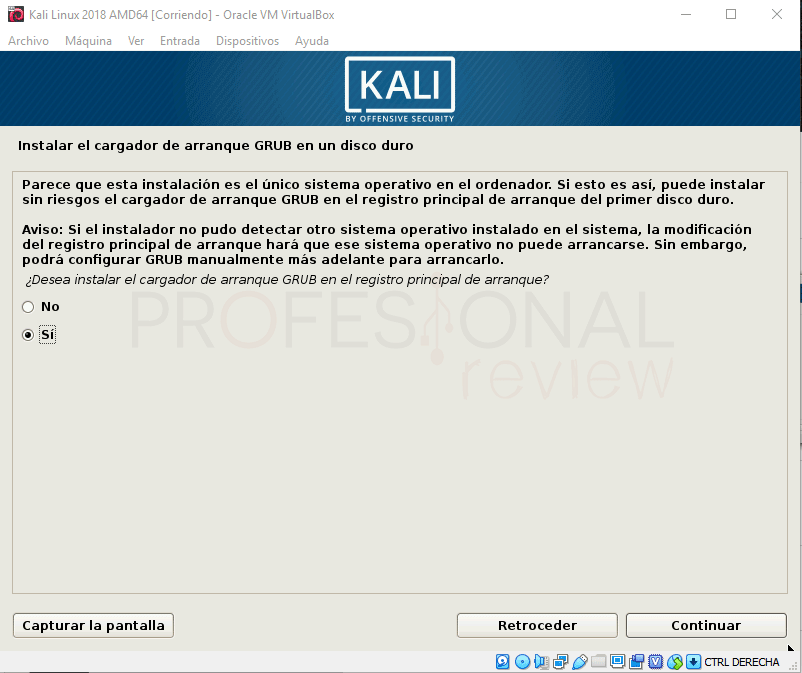
Finalmente, se nos preguntará si queremos colocar grub para gestionar la puesta en marcha del equipo virtual. Le recomendamos que lo instale en caso de que encontremos problemas en el futuro o deseemos modificar esta secuencia con otro sistema.
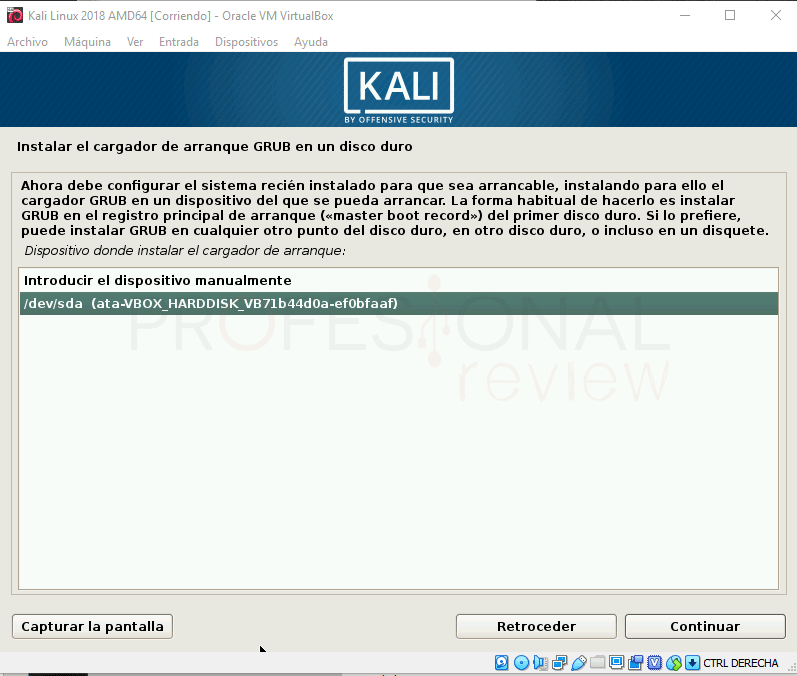
Por supuesto, elegimos la partición activa del sistema, que es donde queremos instalar Kali Linux.
Finalmente, se ejecutará el proceso y luego se iniciará nuestra máquina virtual. Debemos recordar que el usuario predeterminado será el usuario root y la contraseña que ingresamos anteriormente en el asistente.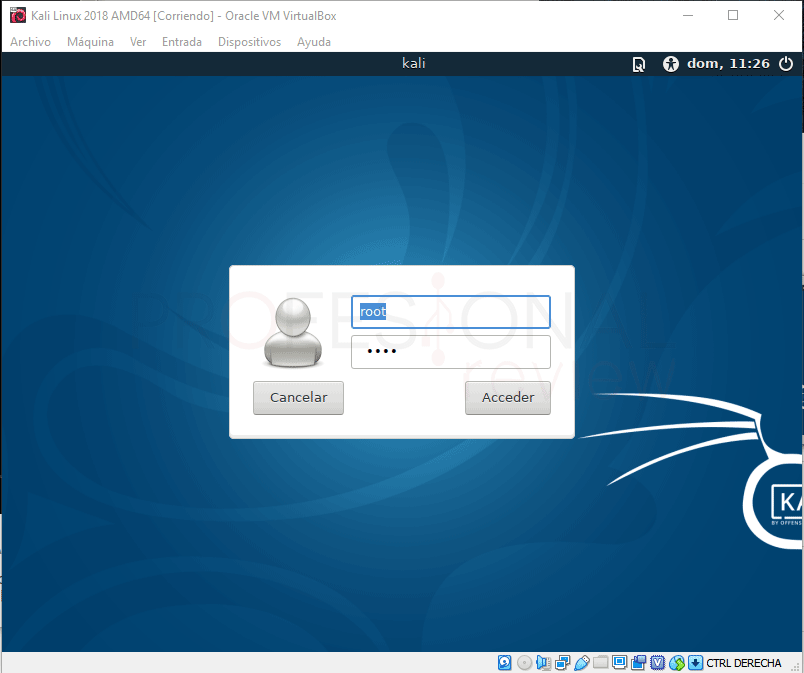
Resources:
Installation Video Tutorial:

Write us a comment: