How to Install Ubuntu From USB
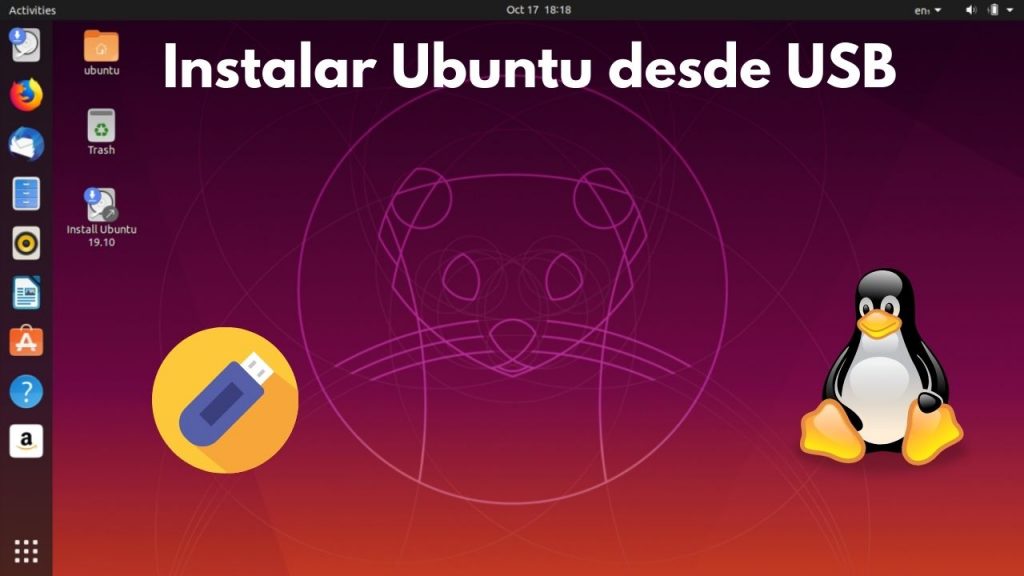
Ubuntu es un software gratuito y un sistema operativo de código abierto. Es una distribución de Linux basada en Debian. Puede ejecutarse en escritorios y servidores. Está dirigido a usuarios comunes, con especial atención a la facilidad de uso y la mejora de la experiencia del usuario.
La instalación de Ubuntu es tan sencilla que aquí te explicamos los aspectos básicos de la instalación.
One of the things to take into account is that we must have the ISO image that we can download from the Official website.
- Download the ISO image from the following link:
 Después de descargar la imagen de UBUNTU, debemos de descargar una herramienta que nos permita bootear nuestra memoria USB, para poder monta nuestro sistema en ella. En este caso ocuparemos Universal USB Installer.
- Download Universal USB Installer in the following link:
Once the tools are downloaded, we configure our USB to be bootable.
How to Hack Facebook with termux from your android WITHOUT ROOT
Steps to Configure our USB to Bootear Ubuntu.
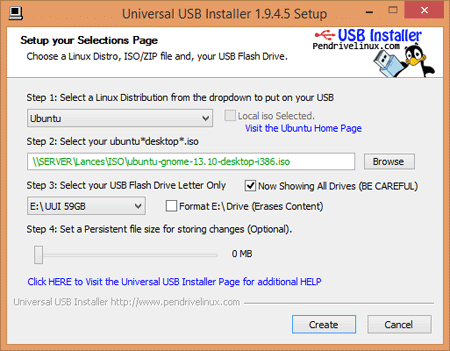
Universal USB Installer (también conocido como UUI) es un programa de creación USB de arranque de Linux en tiempo real. Permite a los usuarios iniciar mediante USB desde distribuciones de Linux, Windows Installer, Windows To Go, escáneres antivirus, software de clonación de discos o cualquier otra herramienta del sistema que se pueda colocar en una unidad flash. El software es fácil de usar, simplemente seleccione la versión de la lista, busque el archivo ISO, seleccione la unidad flash de destino y haga clic en "Crear". Cuando haya terminado, debe tener una unidad flash USB de arranque lista para ejecutarse, que contiene el sistema operativo o la herramienta de su elección.
- To boot our USB flash drive the first thing to do is to open the program Universal USB Installer.
- Select the Ubuntu ISO image.

- Select the USB drive
- And click on create.
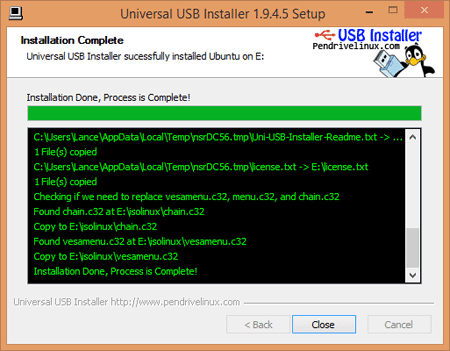
- We wait for the process to finish.

Once the process is completed, our memory is ready to be booted from the boot manager of the system.
Installing Ubuntu from USB bootloader.
Para poder iniciar el gestor de arranque en nuestra computadora es necesario tenerla preparada. Es decir que al realizar este proceso se perderán nuestros datos en la unidad de disco duro donde la vamos a instalar.
- The first thing to do is to turn off our computer completely with the USB attached.
- Encenderla y acceder a la configuración de la BIOS, con F2, F9, F11 etc (depends on your pc).
- We go to device boot loader and look for USB drive with F5/F6 we move on the first option to prioritize as number 1 the booting of the usb drive.
- Exit and save the applied changes.
- When restarting the computer, our USB will boot first.
- The operating system will start and we click on ubuntu.
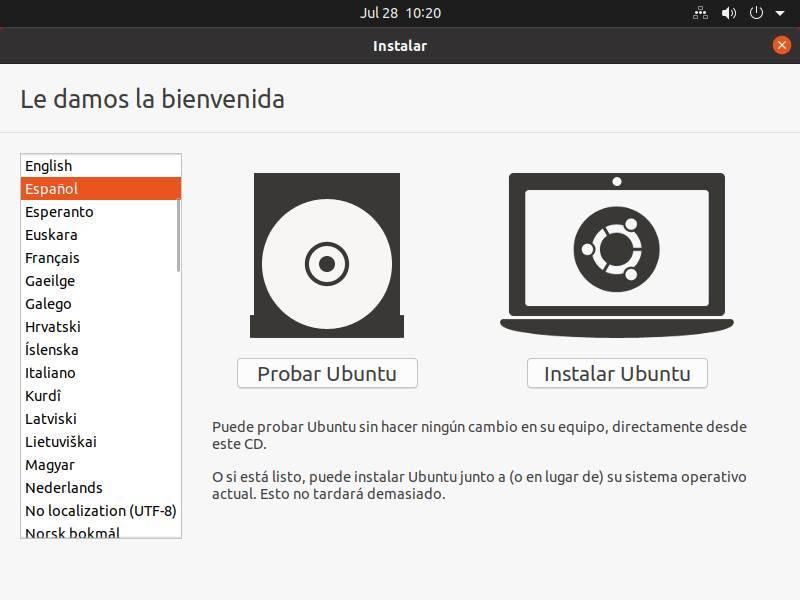
- We wait for it to load the components and click on install ubuntu.
 Elegimos el idioma de instalación, en este caso pondremos Español.
 - Configuramos el idioma de distribución del teclado

Pondremos en español de latinoamericana. - Al continuar nos pregunta que tipo de instalación queremos
Normal: instala una serie de programas esenciales para poder usar la distro para todo, desde navegar hasta ofimática, juegos y multimedia.
Mínima: una instalación mucho más pequeña. Incluye navegador web y los paquetes mínimos necesarios para funciona - Seguimos los pasos de configuración en donde en la parte de la instalación de actualizaciones.
 and click continue.
 - Seleccionamos la partición del disco duro donde queremos instalar Ubuntu.
 Borramos los datos de instalación (si queremos solo tener ese sistema ).
 - By giving install now nos saldrá este recuadro en donde nos aparece las particiones a modificar en la unidad de almacenamiento.
 Click on continue.
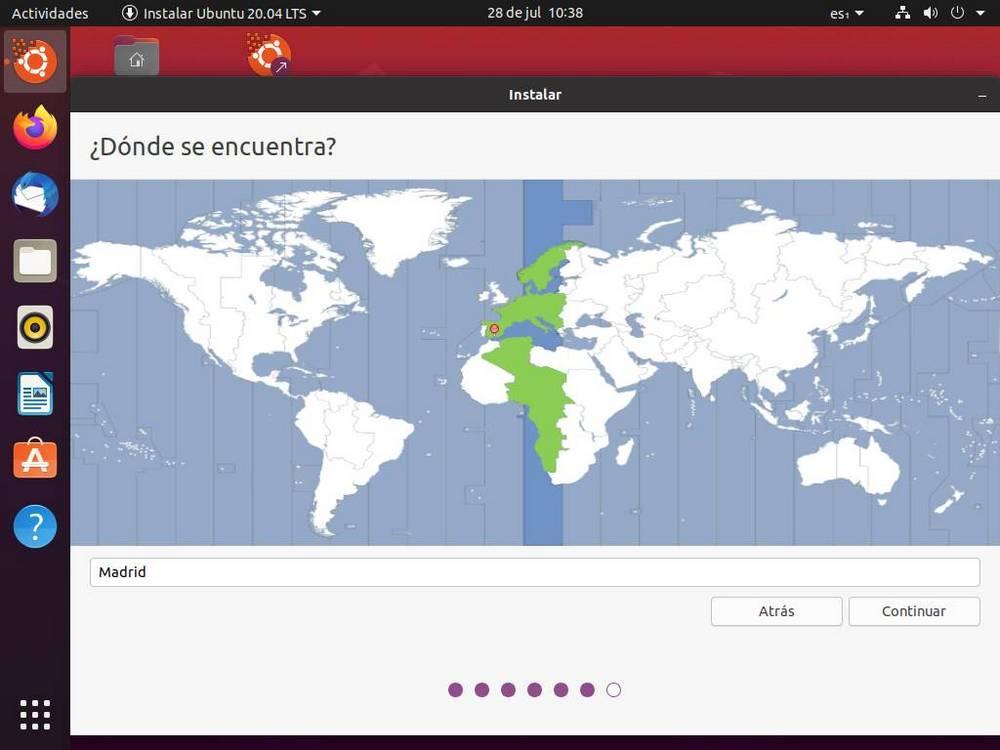
 - Configuramos nuestro idioma de región y localización.

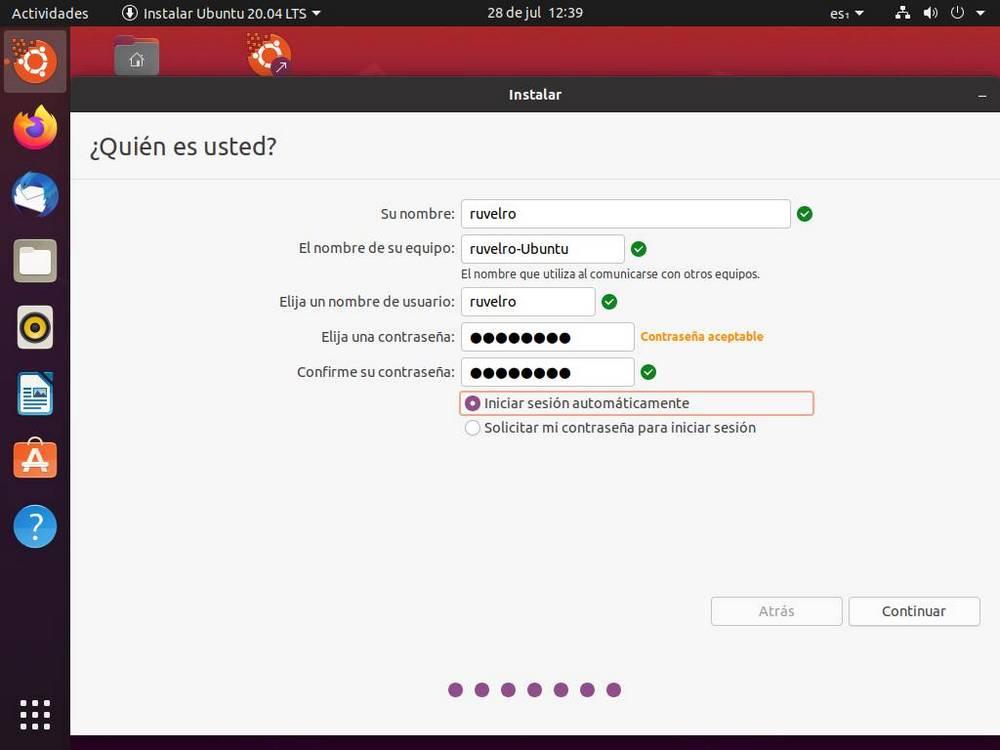
- Colocamos nuestro usuario y contraseña de acceso.

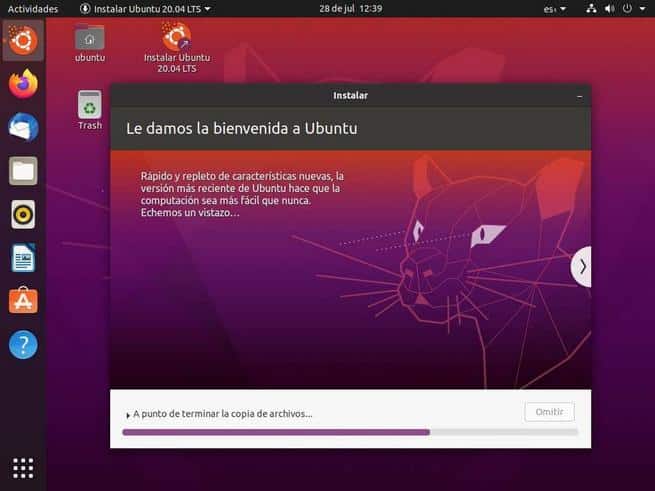
- Esperamos que la instalación se complete, aproximadamente unos 20 minutos eso depende del rendimiento de tu equipo.

- After restarting the computer we remove the USB.
- Ready
Video tutorial de instalación de Ubuntu:

 Elegimos el idioma de instalación, en este caso pondremos Español.
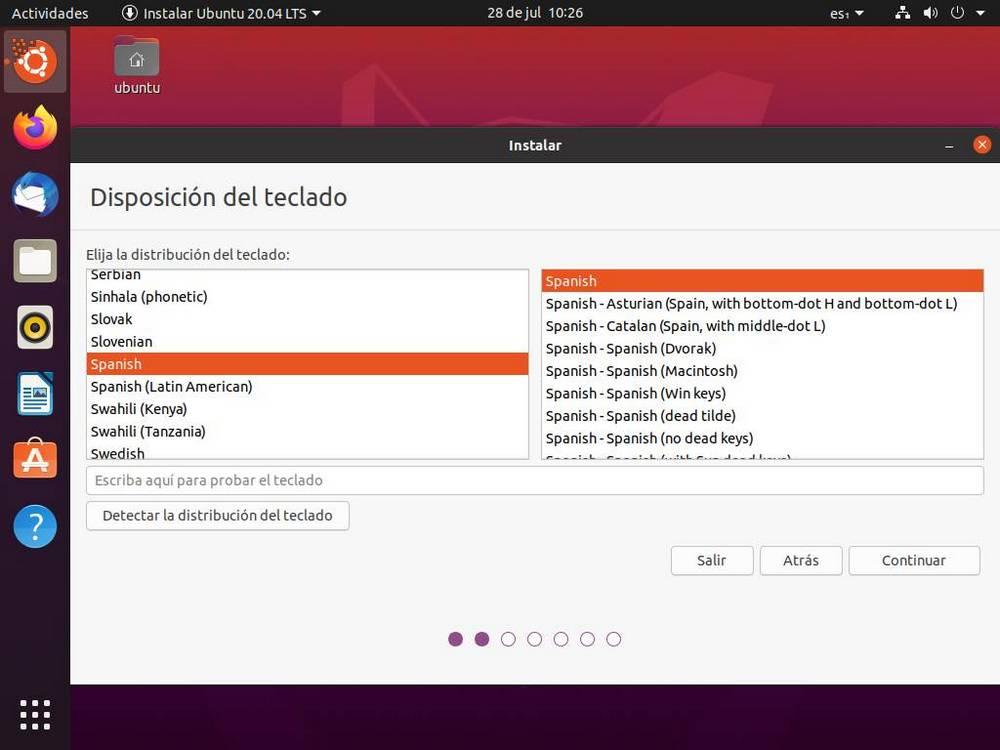
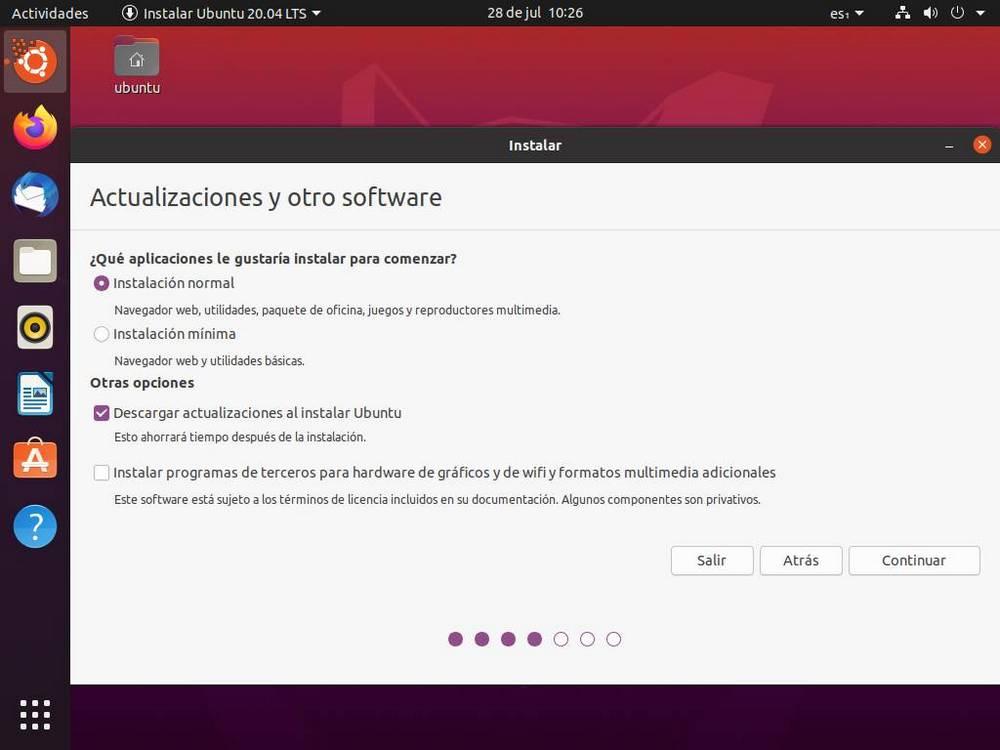 and click continue.
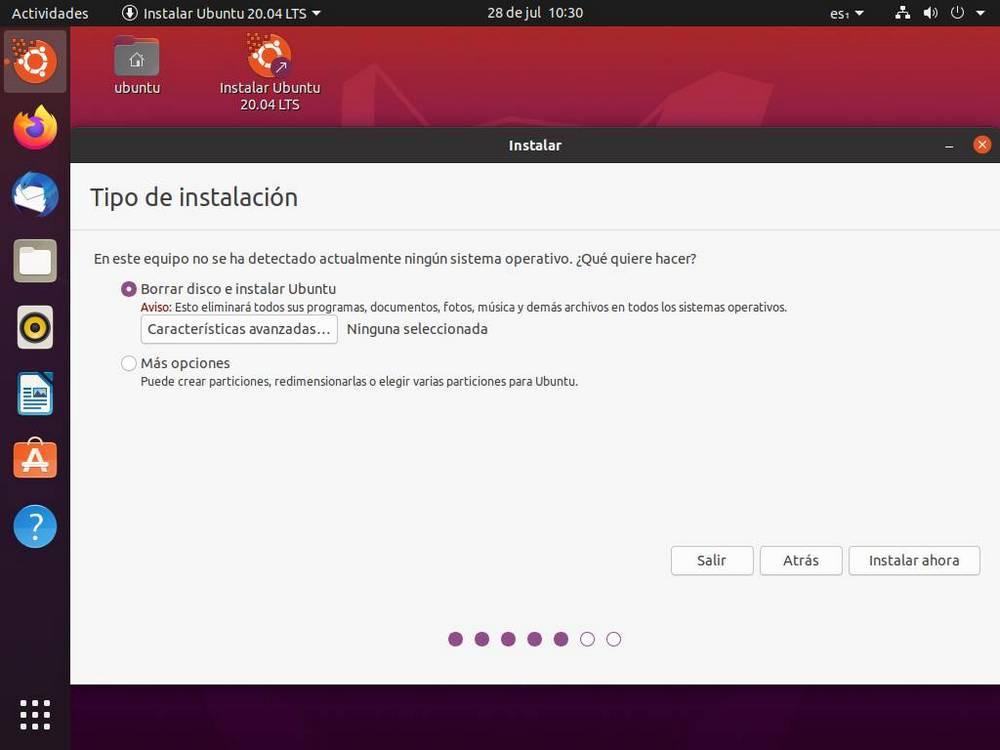 Borramos los datos de instalación (si queremos solo tener ese sistema ).
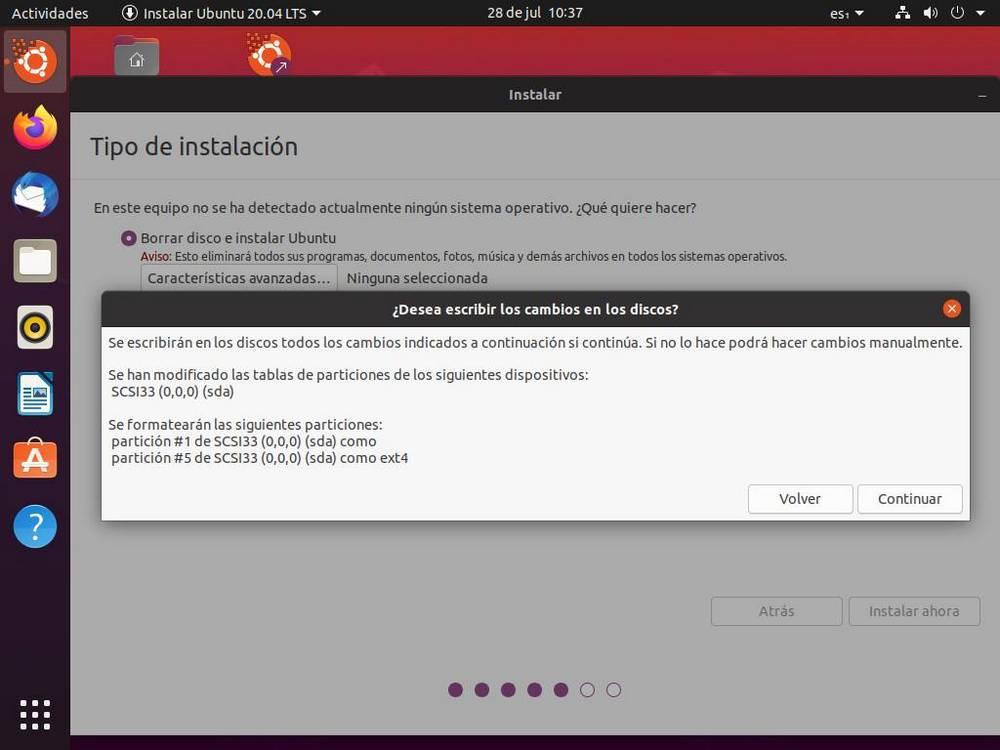 Click on continue.
Write us a comment: